My lineart setup for drawn outlines
Hey you, yes you. You’re trying to make lineart in Blender but your lineart is boring and flat ? Try this setup, yo (what the fuck am I writing)
Basic Setup
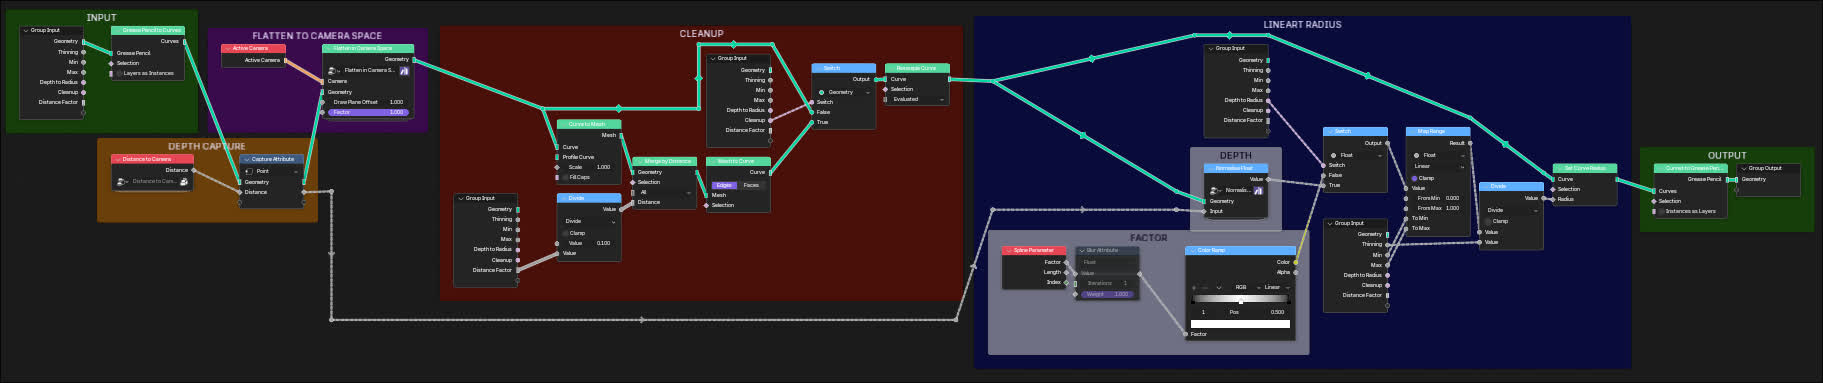
This setup gets grease pencil geometry as input, so it goes as a modifier on top of the lineart modifier.
We have basically three important parts :
Flattening the lineart
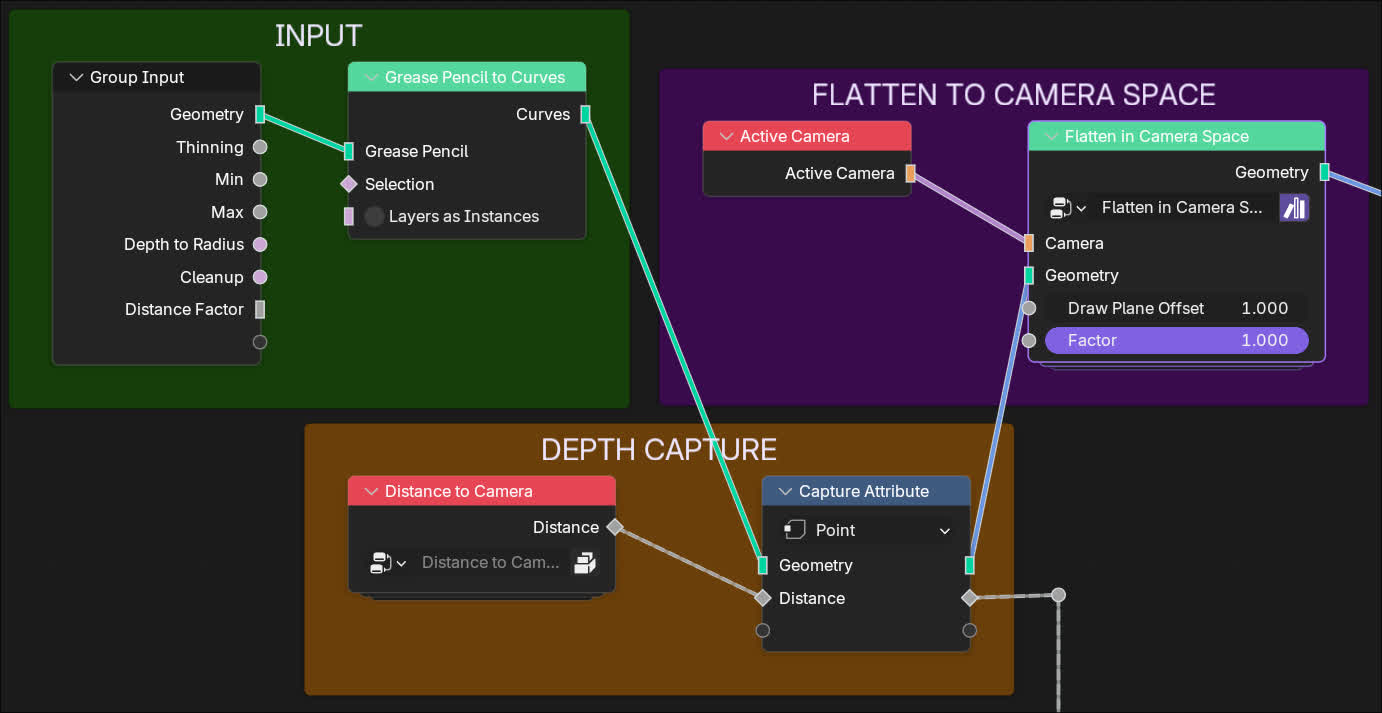
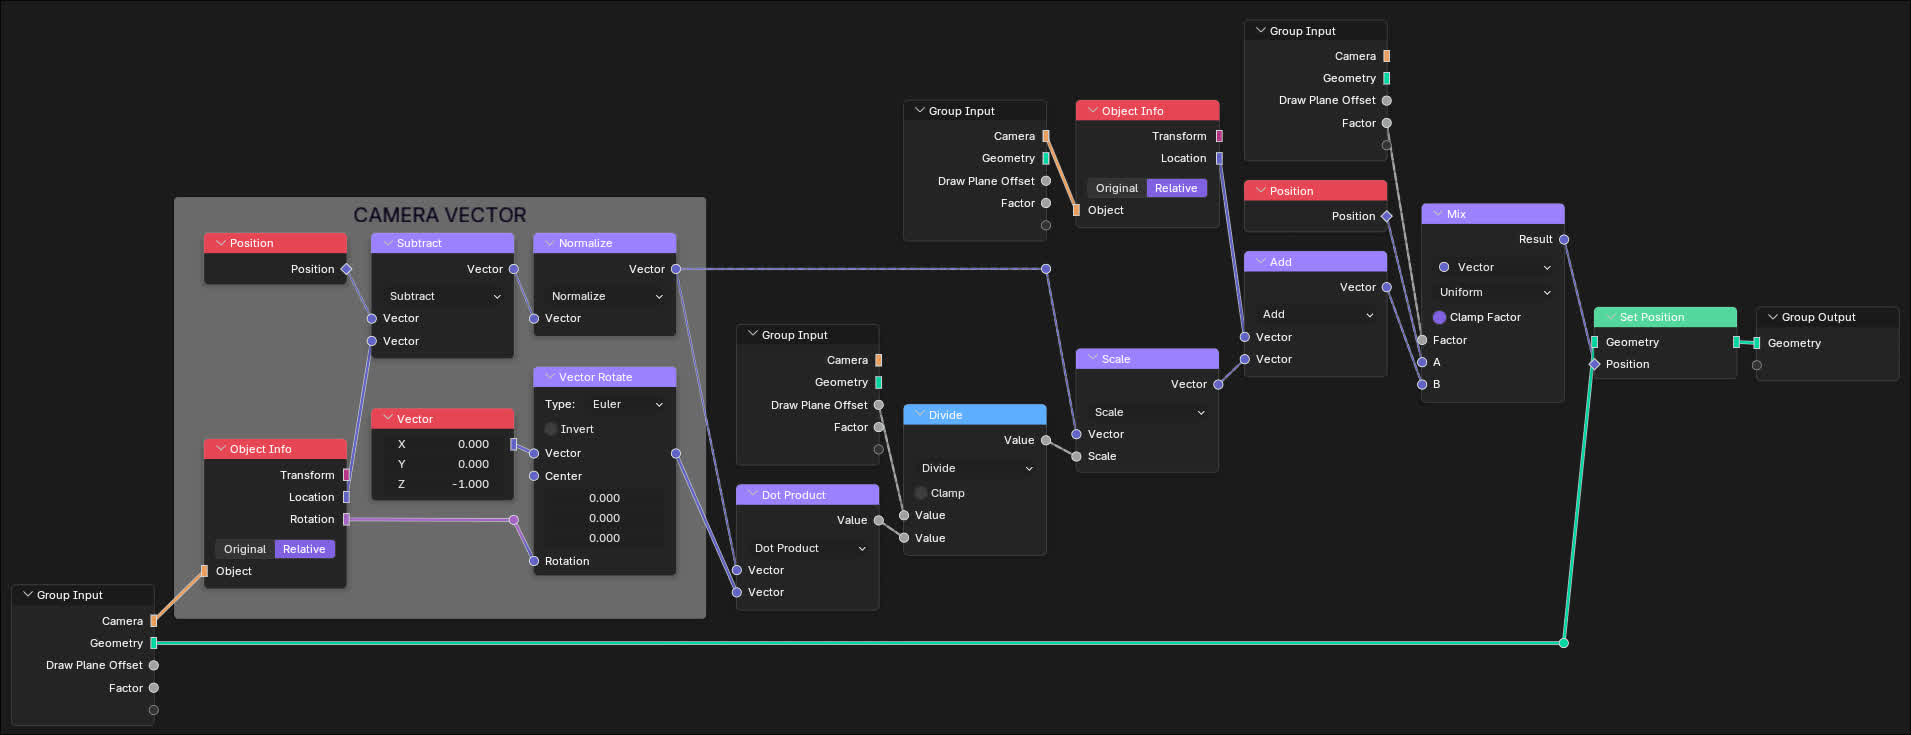
The main node in this section is the Flatten in Camera Space node. “But Mouton”, you say, “I don’t have this node!”. Yeah, you don’t, it’s a custom one I made. Here’s how you make it :
What it does it is basically puts all the lineart on a plane right in front of the camera, without altering the visual result (except for the thickness of the lines, we’ll get to that).
It allows us to manipulate the lineart in a 2D space like a drawing, with is a lot more intuitive and permissive.
Cleaning up the lineart
One problem with the flattening is that it fucks the point density up. Any part of the lineart that was slanted in 3D space will be crushed together, and any visually overlapping lines are now, well, actually overlapping.
So, we can just clean it us using a Merge By Distance node. “But Mouton”, I hear you say, “this node only works on mesh geometry, and this is a curve!”. Solution : make it a mesh, merge it, make it a curve again. We lose data in there, but we don’t care.
Here’s what it looks like :
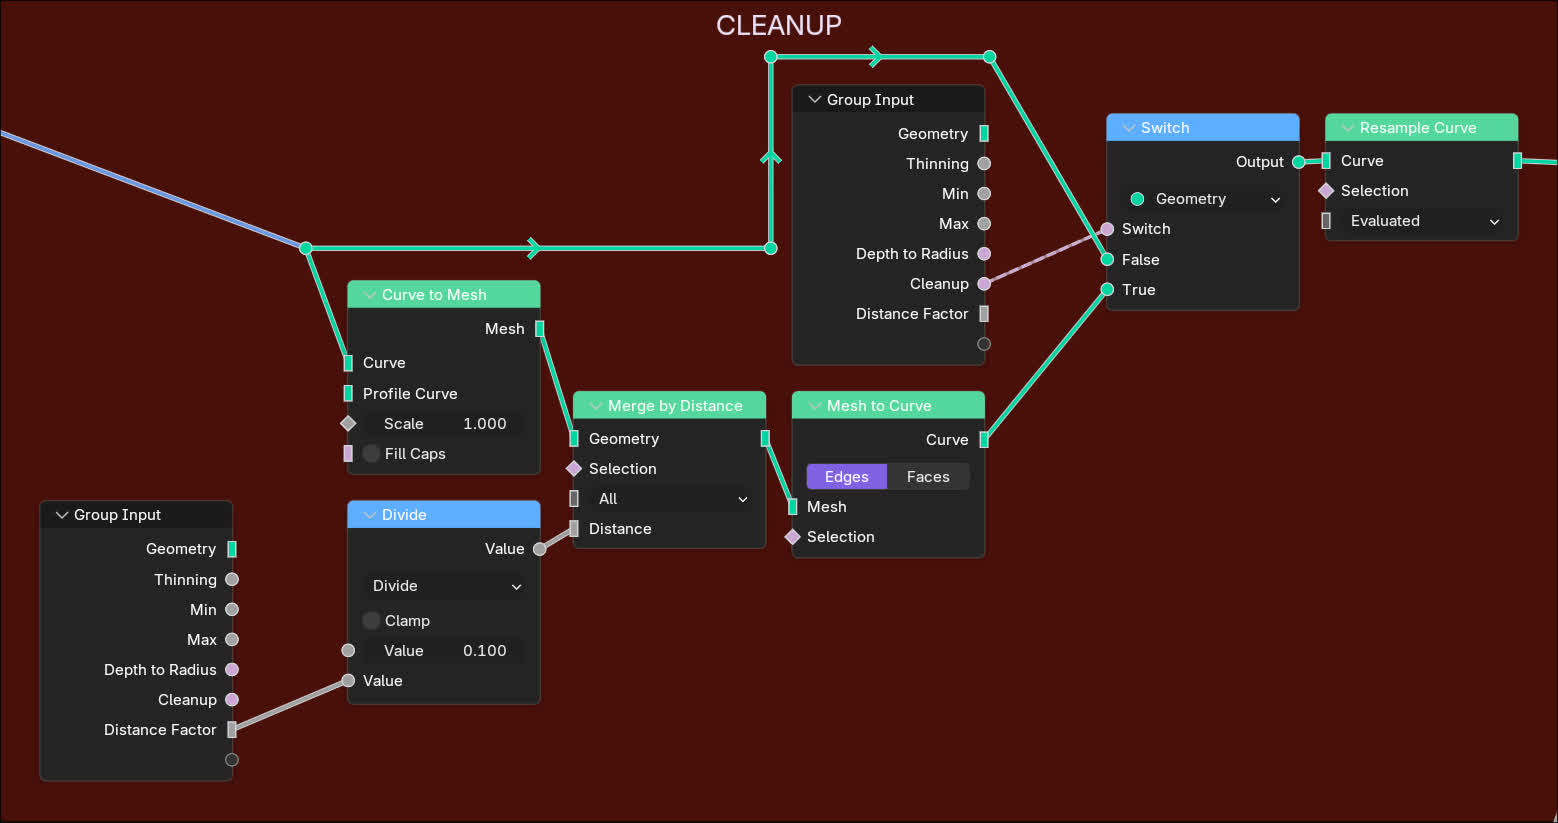
TIP
Always use a switch to toggle things on or off. It’s easier to compare the results, and you can just put it on the best setting by default afterwards.
Driving the radius
For the radius, I tried using depth to drive it, but it looks wrong. Spline factor is the best option from what I’ve found. I’ll have to admit I’m kind of sad that the best option is one of the simplest, I really wanted to find some crazy elegant solution, but it it what it is. Just don’t forget to put the factor through a ramp to make both edge fade out.
Here’s what it looks like in nodes :
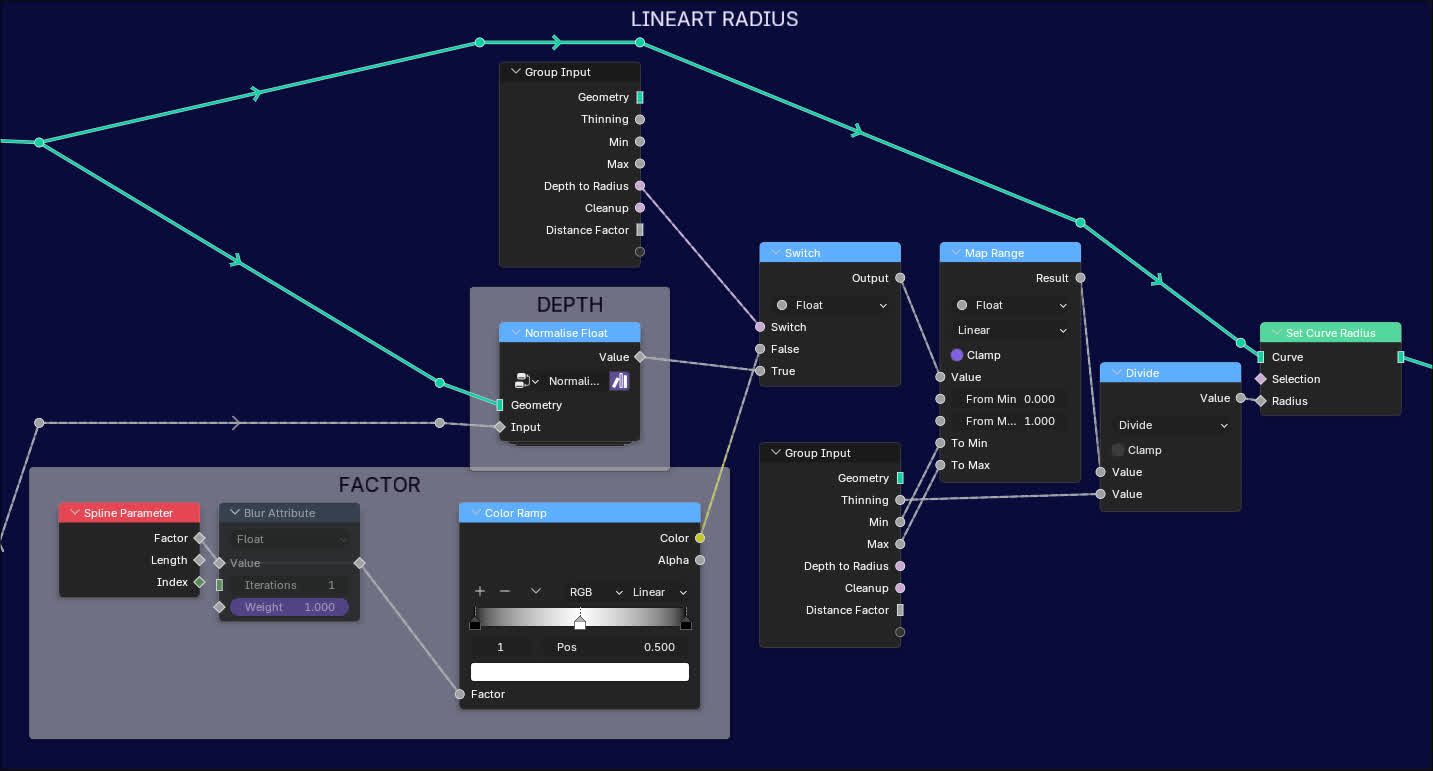
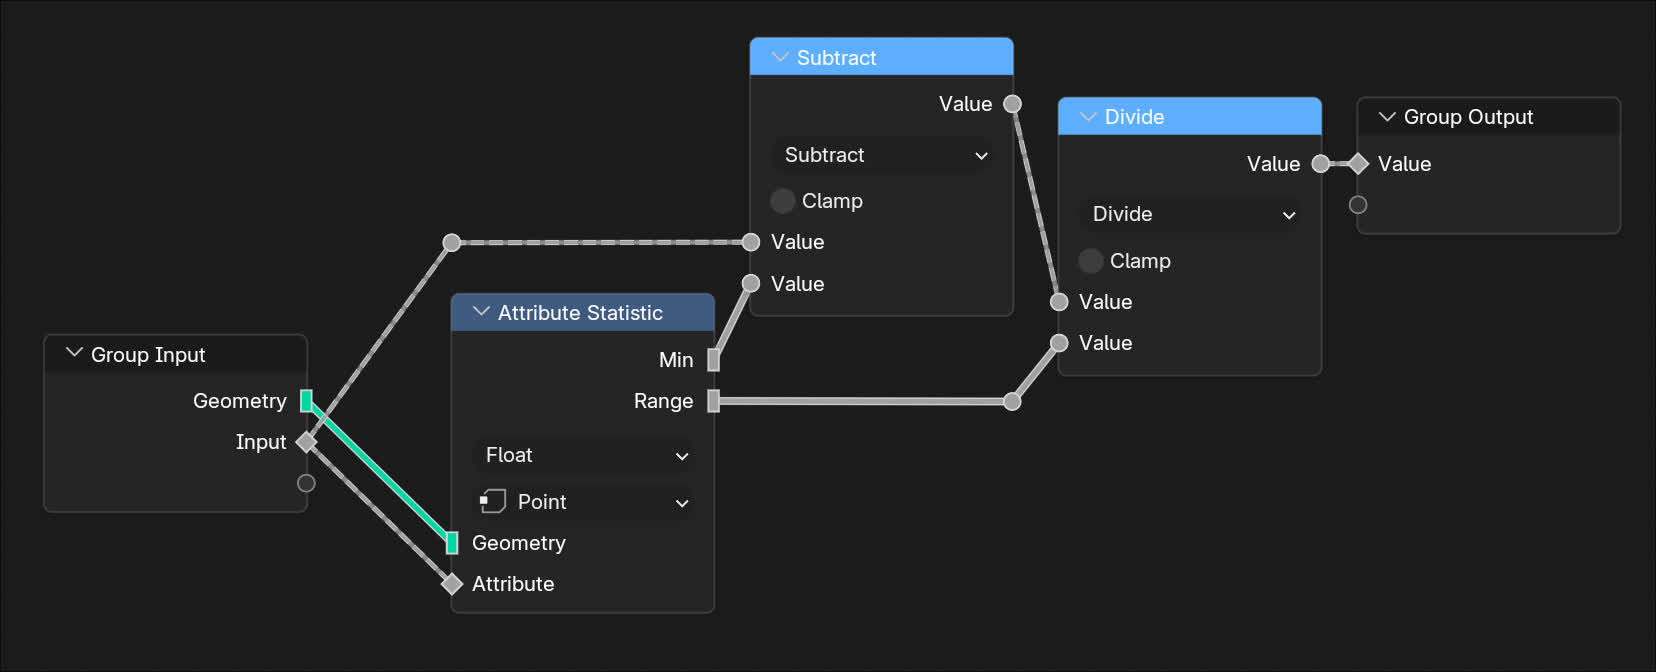
The only custom node here is a float normalisation I used for the depth calculation, and I don’t even actually use it in the final result, so don’t bother with it. Here it is for your curiosity though :
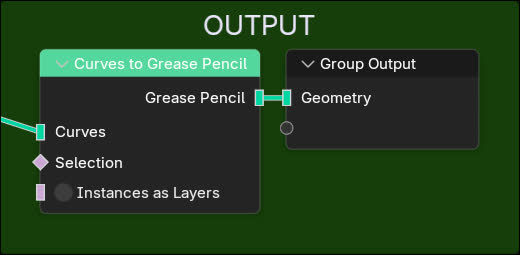
And you’re done !
Just don’t forget to convert to grease pencil again at the end, just in case you’re trying to modify the result further.
What I’ll try and improve on
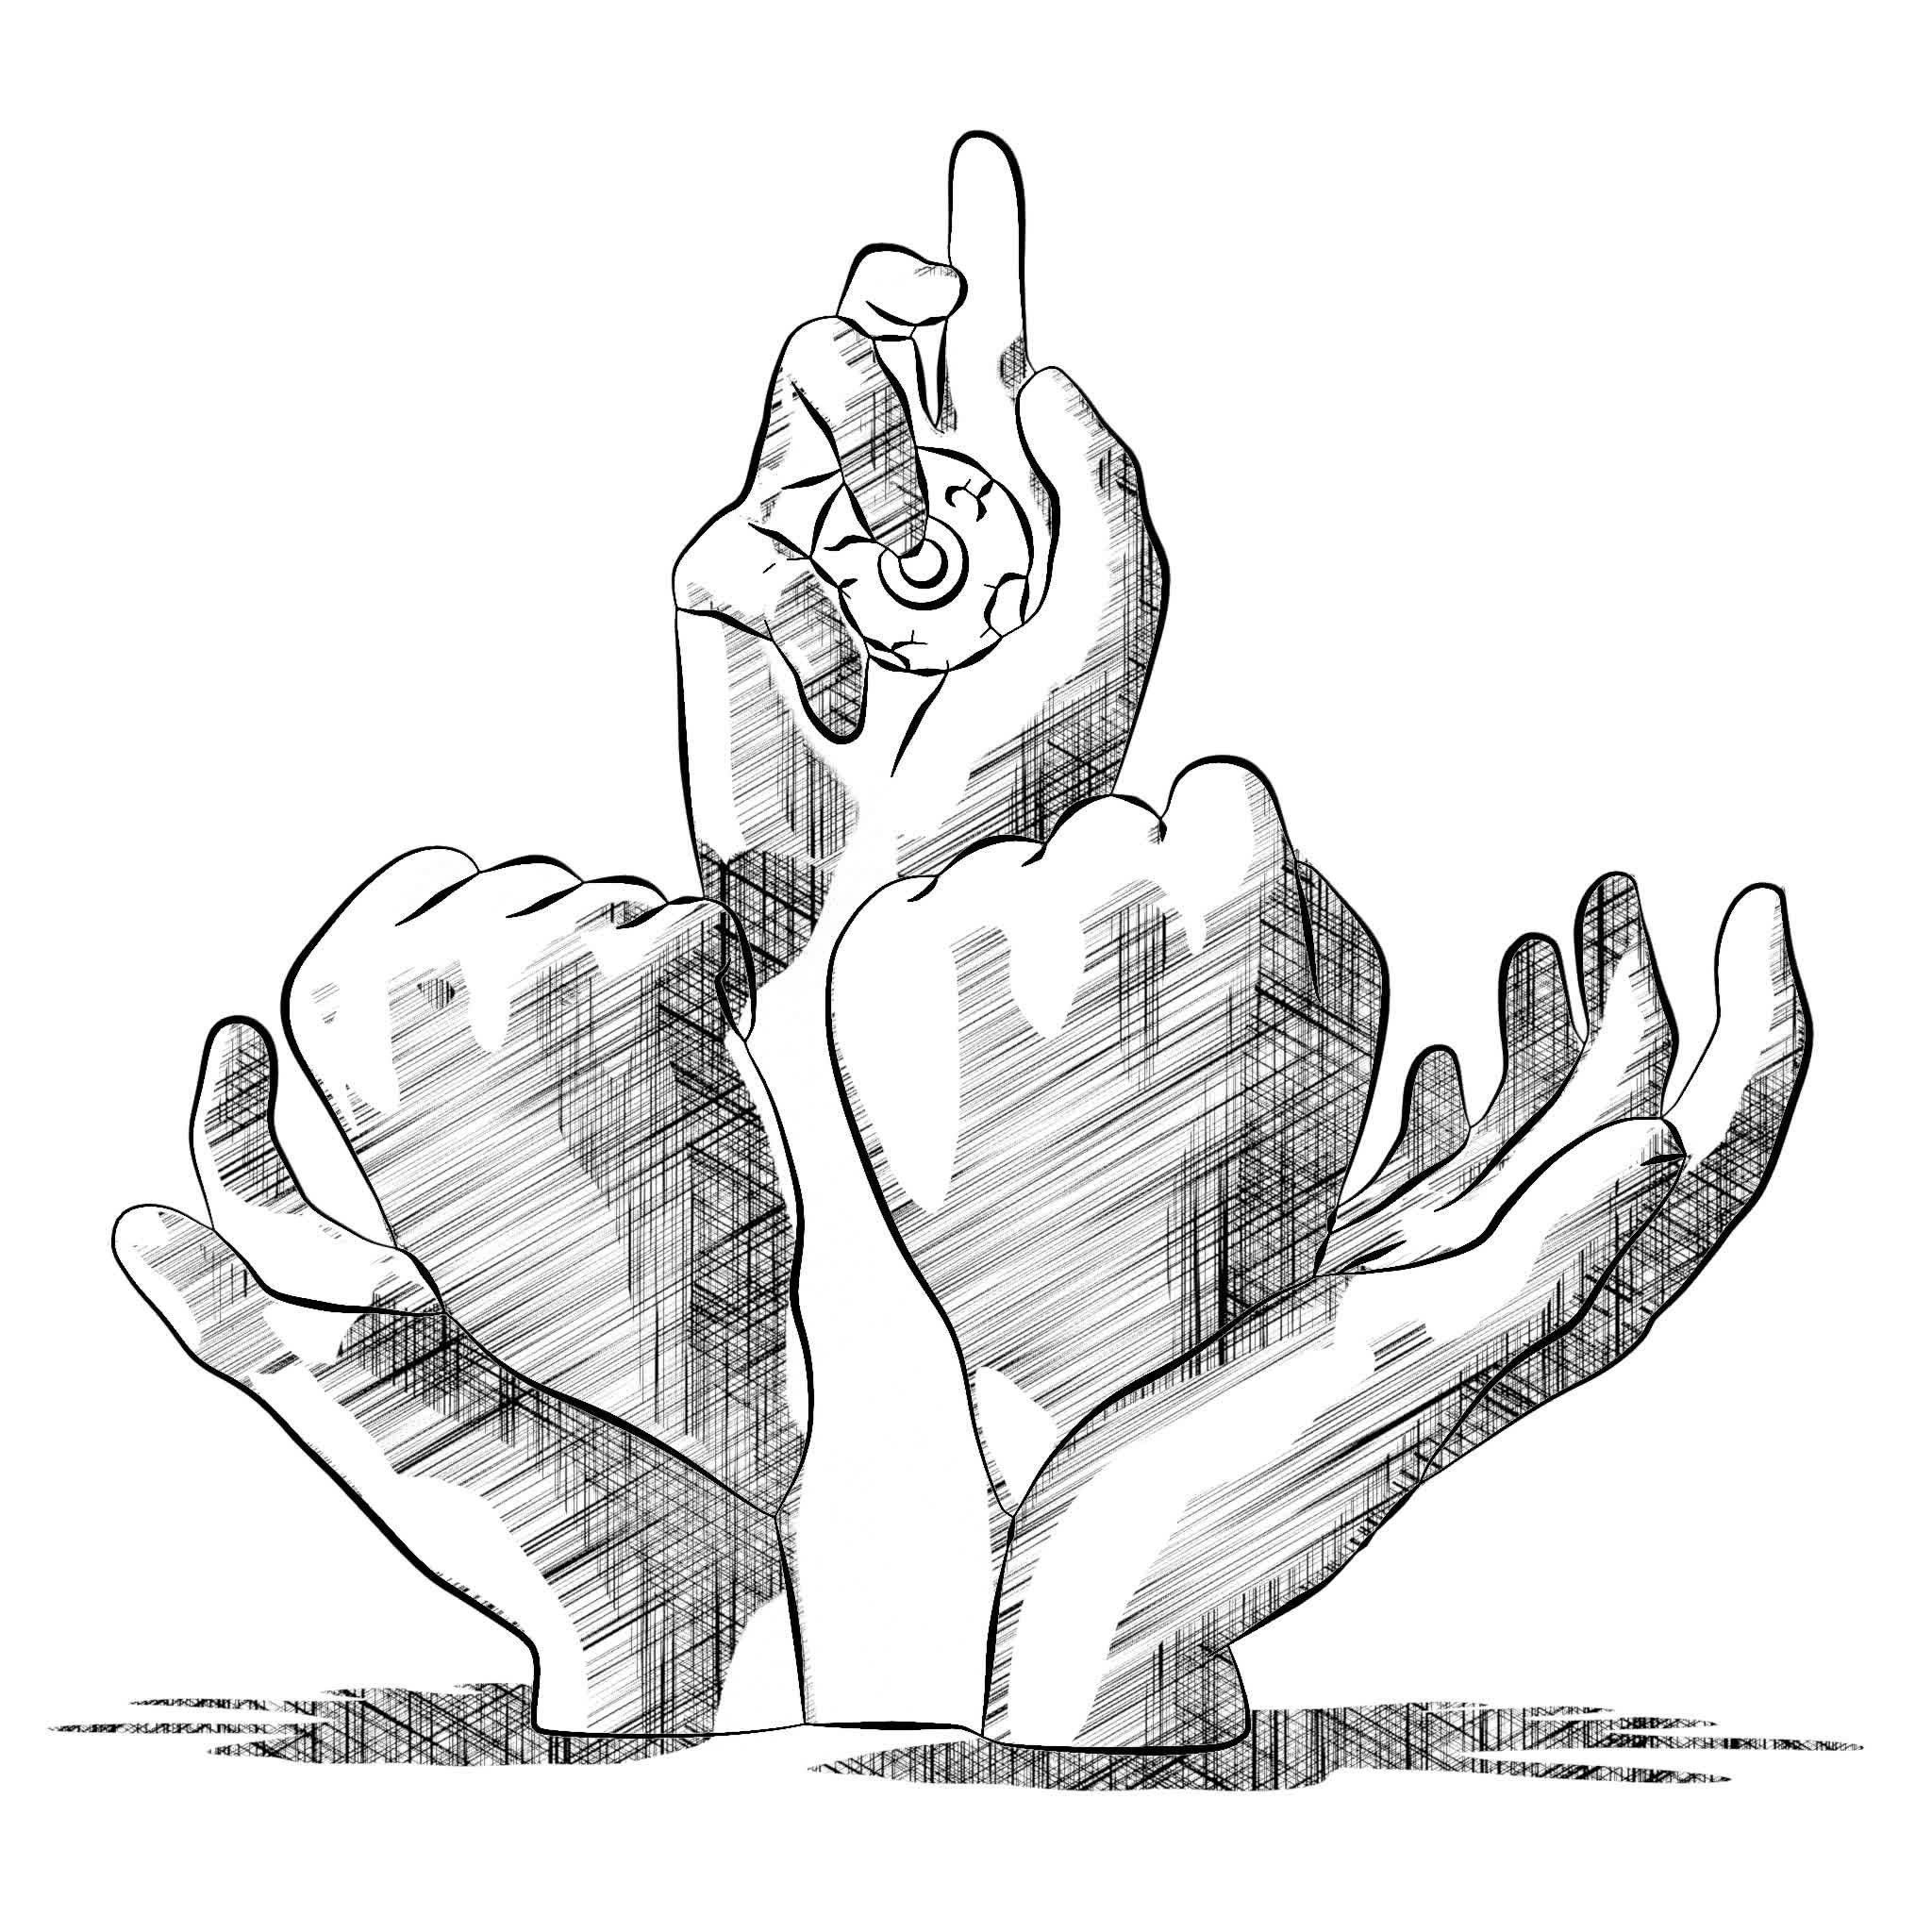
Not mentionning anything other than the lineart here. Don’t ask about the crosshatching, it took me like 20 minutes to make and it’s genuinely not that good looking.
- I want to try and find a better way to clean up the lineart, currently different objects can merge together, and I want to try and find a way to avoid that. Just look at that eye, man, it’s not even round anymore.
- I want to try and make it more stable over time. That’s one of the problems of dynamic lineart, it’s recalculated every frame, so it can look really jittery in animation. Maybe I can try to use an attribute and blur it over time to make it more stable. I just hope that won’t fuck up the look too much.
Here’s a video of the lineart in motion, you can see the jittering pretty well :